Tuesday, January 7, 2014

ORANGE CRANBERRY CUPCAKES

 
With cream cheese frosting and sugared fresh cranberry gems
 

These blew me away! I love fresh cranberries in any baked sweet bread or cake. It adds a touch of tartness to counteract the sweetness. And who doesn't love cream cheese frosting!!! I made little gingerbread cookies and decorated them with marshmallow fondant. So here are the recipes........
Firstly we need to make the sugared cranberries the day before we decorate the cupcakes.


SUGARED CRANBERRY GEMS

3 3/4 cups granulated white sugar, divided
1 3/4 cups water
1 teaspoon pure vanilla extract
zest of 1 orange
12 ounces fresh cranberries
 
  1. In a saucepan over medium heat, combine 2 1/2 cups of sugar, vanilla extract and orange zest and stir occasionally until all the sugar has dissolved.
  2. Take the saucepan off the heat and add all the fresh cranberries.
  3. Once the syrup and the cranberries have cooled down enough, place a small plate over the top to push the cranberries into the syrup.
  4. Once the syrup has cooled down to room tempreture store it in the refridgerator over night.
  5. Add the remaining 1 1/4 cups of sugar to a rimmed plate.
  6. Strain the cranberries and reserve the syrup. Let the cranberries dry on a baking sheet for at least an hour.
  7. Then add the strained cranberries the the sugar and shake well until all the cranberries are well coated in sugar.

ORANGE CRANBERRY CUPCAKES
Makes 36 cupcakes

3 cups cake flour
2 teaspoons baking powder
1/2 teaspoon salt
8 ounces unsalted butter, room temperature
2 cups sugar
3 eggs
1 teaspoon vanilla extract
1 tablespoon reserved syrup from candied cranberries
zest of 1 orange
1 cup milk
1 1/2 cups fresh cranberries


  1. Preheat your oven to 350 F. Line your cupcake pan with cupcake liners.
  2. Sift together cake flour, baking powder, and salt in a bowl and set aside.
  3. Gently toss the cranberries in a tablespoon of flour. Set aside.
  4. In a stand mixer, beat the butter and sugar on medium high speed until pale and fluffy, about 5 minutes.
  5. With the mixer on low add the eggs one at a time, beating well after each addition.
  6. Add vanilla extract, reserved cranberry syrup and orange zest. Mix to combine.
  7. Add a third of your flour mixture until combined, then add half of the milk and mix till just combined. Continue adding ingredients, alternating dry, wet, dry. Mix until just combined.
  8. Gently fold in the cranberries.
  9. Pour batter into cupcake liners about half full.
  10. Bake for 17-19 minutes or until done.


ORANGE CREAM CHEESE FROSTING

16 oz cream cheese, softened
4 oz unsalted butter, room temperature
2 lbs confectioners sugar
1 teaspoon pure vanilla extract
zest of 1 orange
2 tablespoons of orange juice

  1. Using a stand mixer fitted with the paddle attachment, mix the butter and cream cheese until smooth.
  2. Add vanilla, orange zest and juice and mix until combined.
  3. Add the powdered sugar until completely combined. Scrape down the sides of the bowl. Mix again.


Thursday, January 2, 2014

LILY BUG

A cake for Lily. Chocolate cake with Swiss Meringue Buttercream. Lady bugs are made with chocolate clay.


Monday, September 30, 2013

CHOCOLATE CHIP OATMEAL COOKIES

I loved these cookies. Personally I prefer chocolate chip cookies with oatmeal rather than without. These cookies did not dissapoint.

1 cup unsalted butter
1 cup light brown sugar
1/2 cup white granulated sugar
2 eggs
2 teaspoons pure vanilla extract
1 1/4 cups all-purpose flour
1/2 teaspoon baking soda
1 teaspoon salt
3 cups rolled oats
1 cup chopped walnuts
1 cup chocolate chips

Method

Preheat the oven to 325 degrees F (165 degrees C)

In a large bowl, cream together the butter, brown sugar, and white sugar until smooth. Beat in eggs one at a time, then stir in vanilla. Combine the flour, baking soda, and salt; stir into the creamed mixture until just blended. Mix in the rolled oats, walnuts, and chocolate chips. Drop by heaping spoonfuls onto ungreased baking sheets.

Bake for 12 minutes in the preheated oven. Allow cookies to cool on baking sheet for 5 minutes before transferring to a wire rack to cool completely.

VANILLA CAKE

Another cake from The Cake Boss.  This cake is very moist and really yummy and can be made into cupcakes. I used butter instead of the oil and loved it.


21/2 cups cake flour
2 cups granulated white sugar
3/4 cups of vegetable oil OR 1 1/2 sticks (170.5g) unsalted butter
2 1/4 teaspoons baking powder
1 teaspoon pure vanilla extract
1/2 teaspoon salt
4 extra-large eggs, at room temperature
1 cup whole milk

Method
Position the oven rack in the center of the oven. Preheat the oven to 350 F (180 C)
Grease two 9-inch cake pans with *cake release.

Put the flour, sugar, butter or oil, baking powder,vanilla and salt in the bowl of a stand mixer with a paddle attachment. Mix on slow until all the ingredients are combined, then low-medium and continue to mix until smooth, approximately 1 minute.

With the mixer still mixing add eggs one at a time, incorporating eggs into mixture before adding the next. Stop mixing and scrape down the bowl making sure all ingredients are incorporated. Turn the mixer to low-medium speed until all the eggs are thoroughly mixed in. This will ensure that the sugar is dissolved and that the flour has been fully incorporated, which will help produce a luxurious mouth-feel in the final cake.

With the motor running, add the milk, 1/2 cup at a time, stopping the motor to scrape down the sides and bottom between the two additions. Continue to mix for another minute until the mixture appears smooth. Before baking, be sure the batter is at 70-73 F or the cake will crown.

Divide the batter between the 2 cake pans. Bake until done about 25-30 minutes.


*CAKE RELEASE
1 cup oil
1 cup all purpose flour
1 cup shortening

Mix all ingredients in a mixer till well blended. Keep the mixture in an air tight container in the fridge.
Use a pastry brush to grease cake pans.

VANILLA SPONGE CAKE

This recipe is from The Cake Boss. Easy to make and absolutely delish. It can easily be made into cupcakes.

4 eggs
2 cups sugar
1 tsp vanilla
1 cup whole milk
1/4 cup butter (lightly salted)
2 cups all-purpose flour
2 tsp baking powder
1/4 tsp salt


    1. Beat eggs in large mixing bowl with paddle attachment for 4 minutes. Do not skip this step!

2. Add sugar, and continue beating for another 4-5 minutes until light and fluffy. Add vanilla and stir on low until just combined.

3. In a separate bowl, sift together dry ingredients. Add to eggs and sugar on low speed until just combined.

4. In a saucepan, heat milk and butter on low heat just until butter is melted. Add to batter, beat just until combined.

5. Pour into two greased and floured 8" round cake pans.

6. Bake at 325 F until the middle springs back when touched, or a toothpick inserted in the center comes out clean. Remove from oven and let stand in pans for 10 minutes. Then turn out onto wire cooling racks and cool completely.

Hint: Cakes are close to being done when you start to smell them.

Wednesday, February 13, 2013

Moshling Monster Cake

 Scarlet O'Hara
 
My daughter turned another year older in February and likes the Moshling Monsters. Luckily she chose a fairly basic Moshling she wanted replicated as a cake. I was up for the challenge and the cake got rave reviews from all her friends.
The cake consisted of 3 eight inch round cakes, sanwhiched with chocolate swiss meringue buttercream. After carving the shape of the Moshling I applied an exterior coat of swiss meringue buttercream. I applied a fairly thin fondant layer and added the extra detail of eyes, ears, hands, feet, fur and smile.

 
Cutie Pie, Oddie, Iggy
 
Here are the sugar cookies depicting other Moshy Monsters. They were delicious and were eaten in no time. 


Wednesday, December 26, 2012

STICKY TOFFEE PUDDING

So Christmas has come and gone and I did quite a bit of baking this year. I decided to make Sticky Toffee pudding for dessert on Christmas Eve. I found Medjool Dates, which tend to be more expensive than other dates, but so worth it! The dessert was a hit.


Cake

1 cup water
3 tablespoons strong coffee
1 tablespoon brandy, scotch or rum
1 cup coarsely chopped Medjool dates (pitted)
1 cup all-purpose flour
1 teaspoon baking soda
1 teaspoon baking powder
1/4 teaspoon ground cinnamon
pinch of salt
1/2 cup packed brown sugar
1/4 cup unsalted butter, at room temperature
1 large egg
1 teaspoon vanilla extract

Toffee Sauce

3/4 cup packed brown sugar
6 tablespoons unsalted butter
3/4 cup 35% cream


Preheat the oven to 350 Fahrenheit. Grease an 8 inch/2L square baking dish.
 
In a small saucepan, bring water, coffee and liquor to a boil. Add the dates and remove from the heat.
 
In a small bowl combine the flour, baking soda and powder, cinnamon and salt.
 
In a mixer cream the butter and sugar until light and fluffy. Beat in the egg and vanilla.
 
In a food processor, pules the date mixture with the liquid until just chunky. (I blended the mixture until it was smooth)
 
Beat in flour mixture alternately with date mixture, ending with the flour until the batter is thick and smooth..
 
Pour batter into your greased dish and smooth the top.
 
Bake in the oven for 30 to 35 minutes or until the cake tester comes out clean.
 
Meanwhile make your toffee sauce. In a saucepan cook the sugar, butter and cream over a low heat until slightly thickened and brown. This usually takes a few minutes.
 
When your dessert comes out of the oven poke some holes with a skewer and slowly pour about 2/3's of the sauce over the cake. Reserve the rest of the toffee sauce to serve with the dessert.

Serve this delicious dessert with vanilla ice cream.

Tuesday, December 11, 2012

CHRISTMAS PENGUIN


It is that time of year again!! I can't believe how quickly this year has gone. I am making more cakes this year and trying out new techniques and recipes. This cake was a standard Vanilla cake with Vanilla Swiss Meringue Butter cream (my favourite). The theme for this cake, if you couldn't tell was Christmas...... ;) I wanted to make a penguin and did so using gum paste. The tree was made on a waffle cone and the books were also gum paste. This cake was for a library, hence the books! I was really pleased with how this one turned out.

Friday, October 19, 2012

FONDANT AMOUNT GUIDE


As an instructor I am always asked how much fondant should be used to cover different sized cakes. Here is a guide for you basic round and square cakes.

CAKE SIZE              LAYERS               FONDANT AMOUNT

6"                                                     2- Layer Round                              1 lb.
8"                                                     2- Layer Round                              1 lb. 8 oz
10"                                                   2- Layer Round                              2 lb. 8 oz
12"                                                   2- Layer Round                              3 lb. 8 oz
14"                                                   2- Layer Round                              5 lbs.
16"                                                   2- Layer Round                              7 lbs.

6"                                                     2- Layer Square                              1 lb. 8 oz.
8"                                                     2- Layer Square                              2 lb. 8 oz.
10"                                                   2- Layer Square                              3 lb. 8 oz.
12"                                                   2- Layer Square                              5 lbs.
14"                                                   2- Layer Square                              6 lbs.                                         
16"                                                   2- Layer Square                              8 lbs.

Thursday, May 17, 2012

WILTON DEMO CAKES


My Course 4 (Wilton: Advanced Gumpaste Flowers) cake, which will be used at Michaels in Markham to inspire students to make beautiful flowers. Thankfully the flowers were made ahead of time while teaching Course 4, so the cake was put together fairly quickly. Any Gumpaste flowers will last you a lifetime unless they get wet.

Thursday, April 12, 2012

EASTER COOKIES

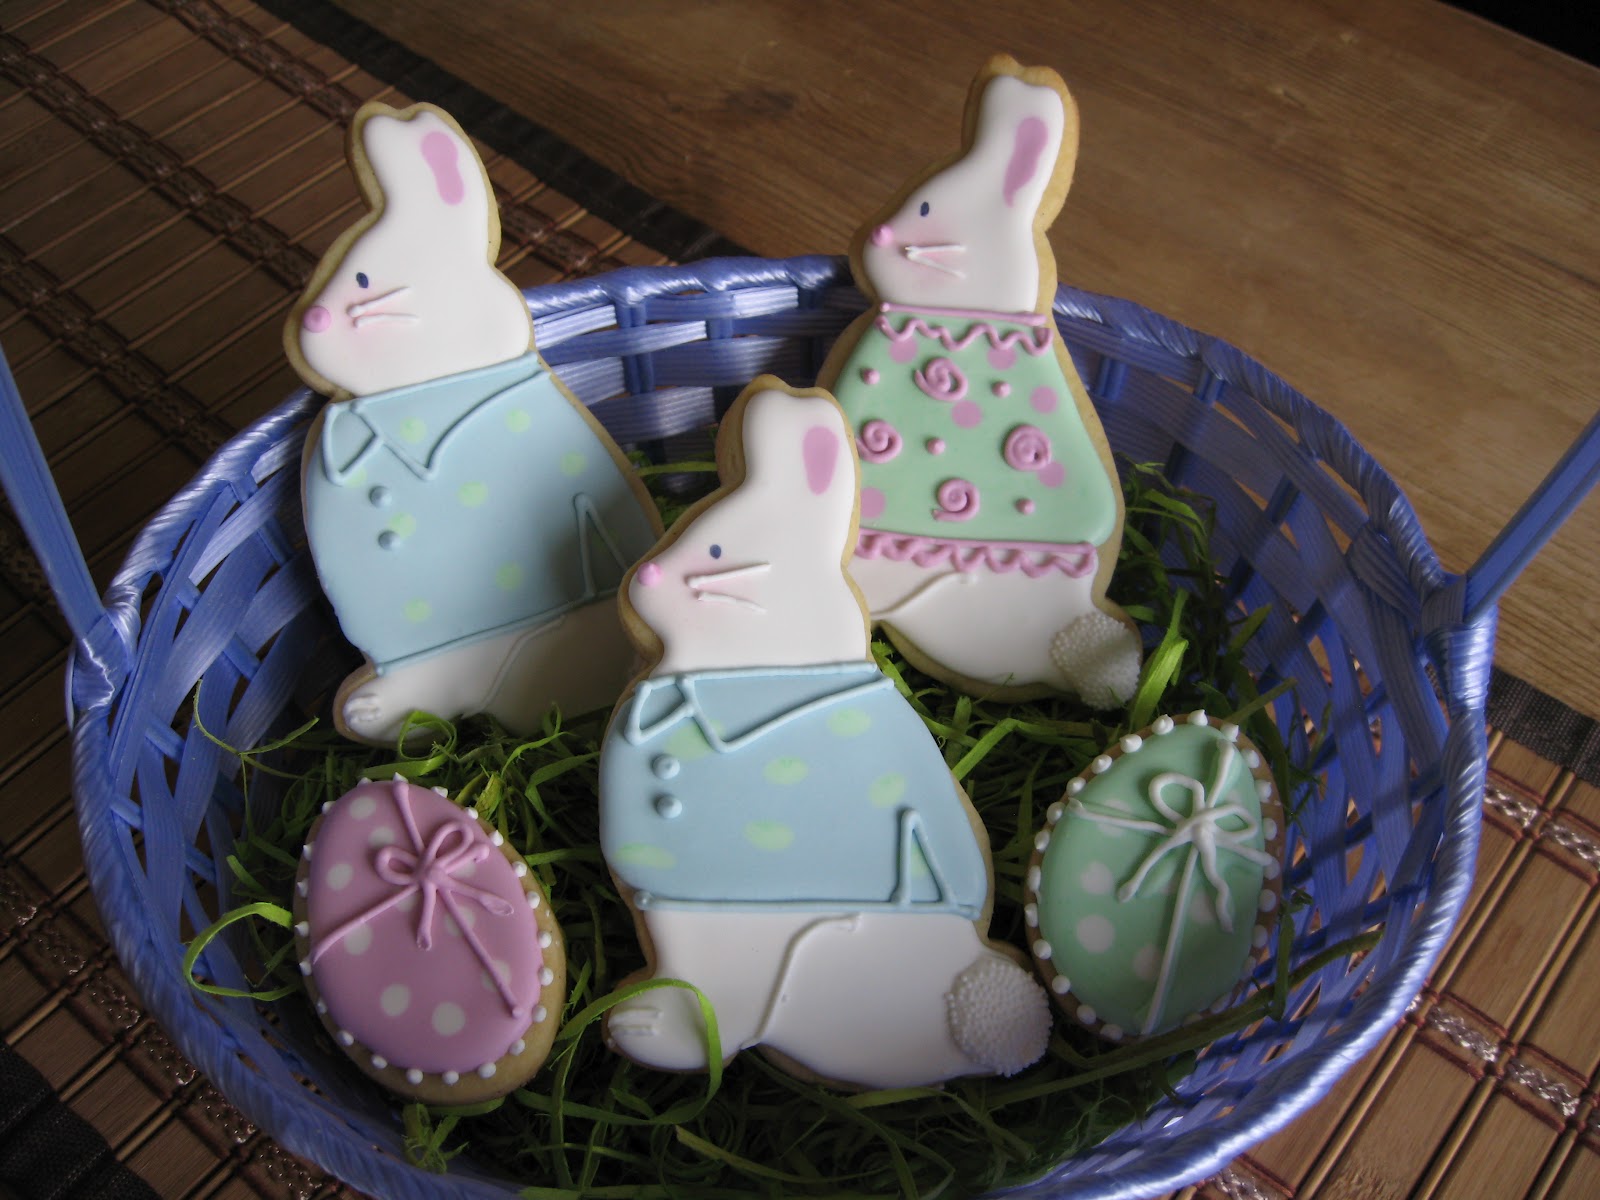
My daughter wanted to make cookies on the Easter weekend so we made the sugar cookie recipe on my blog. They turned out great. For the cookies I tried using Vanilla Bean Paste instead of Vanilla Extract and the were totally delicious. You can see the vanilla seed specks in the cookie and I like that.


These cookies were flooded with royal icing and some over piping was done. Needless to say the cookies are finished and they were absolutely delicious.

Monday, March 19, 2012

CHOCOLATE CUTOUT COOKIES

I absolutely love this chocolate cookie. Treat them like a sugar cookie, roll out the dough and cut out your favourite shapes. They can be decorated with royal icing, butter cream or fondant.

1 cup of unsalted butter (room temperature)
2/3 cup granulated white sugar
1/2 cup brown sugar
1 large egg (room temperature)
2 tablespoons strong coffee or a coffee liqueur (coffee can be made with 1 teaspoon of instant espresso powder with 2 tablespoons of hot water, and cooled)
1 teaspoon vanilla extract
1/2 cup cocoa powder
3 cups all-purpose flour
1/2 teaspoon baking soda
1/4 teaspoon fine salt

METHOD
1.Sift the flour, cocoa powder, baking powder and salt.Set aside.
2.In a large mixing bowl beat together the white sugar, brown sugar and the butter. Beat until
   light in colour, about 3 minutes.
3. Add the egg and beat well. Add the coffee or liqueur and beat until incorporated.
4. Add the flour mixture, 1 cup at a time and mix until all the flour is incorporated.
5. Divide the dough in half, form into 2 disc shapes and wrap in plastic wrap.
6. Chill the dough in the fridge for at least 1-2 hours.
7. Roll out the dough to desired thickness on a floured surface and cut out your favourite shapes.
8. Place the cookies onto a parchment or Silpat lined cookie sheet, 1 inch apart.
9. Bake at 350 degrees Fahrenheit (180 Celsius) for 6-8 minutes. The size of your cookies will determine if they need more or less time.
10.Once cookies are baked transfer them to a cooling rack to let them cool.
11.Cookies can be stored for a week at room temperature and they freeze well for 3 months. Make 
     sure they are well covered in a container.

TIPS FOR BAKING CUT OUT COOKIES
- To ensure even thickness of the dough, use dowels (desired thickness of your cookie) on either side of the dough while rolling. This will also ensure that your cookies bake evenly and at the same time.

- To ensure that your dough doesn't spread while baking refrigerate the cut out cookies on the baking sheet for at least 10 minutes before baking. You can also put them in the freezer for 5 minutes if you are in a hurry.

- To make sure your cookie dough doesn't stick to the cookie cutter, dip the cutter in flour in between
cutting out shapes.

Saturday, March 17, 2012

CAKE TIPS

CAKE FLOUR  VS.  ALL-PURPOSE FLOUR
For best results when baking cakes, cake flour does produce a more fine, soft texture. Cake flour is a finely milled and typically bleached variety of flour.It also has a lower content of gluten-producing protein. The bleaching process in flour also raises the acidity of the batter, which allows the starch in the flour to absorb more moisture, further enhancing the cakes tenderness. If you can't find cake flour you can substitute 3/4 cup all-purpose flour mixed with 2 tablespoons of cornstarch for each cup of cake flour called for in a recipe.


TEMPERATURE: EGGS, MILK & BUTTER
For a smooth batter you want to make sure that the eggs, milk and butter are at room temperature when mixing them into a cake batter. Cold eggs and milk can harden butter when mixed in. This can result in a curdled appearance. You can heat up butter and milk in the microwave but this is not ideal as overheating can occur. The eggs you can put them in a bowl of warm tap water to bring them to room temperature. Once you put the eggs into warm water the cold eggs will bring the water temperature down so drain the first lot of water and then refill with more warm water from the tap. This should bring the eggs to room temperature after about 5 minutes. Ideally you want to let the butter, milk and eggs come to room temperature on there own but if you have not planned ahead use these techniques.


OVER BEATING BATTER
We have all learned that over beating a batter can cause the cake to become tough due to over working the gluten.. This is the case when you use all-purpose flour as it contains more gluten than cake flour. When using cake flour (very low gluten content) beating it for a short period of time actually helps smooth and aerate the batter. Once the batter is mixed, beat it on high speed for five seconds and you will notice it immediately transforms into a smooth emulsion, ensuring that the ingredients are evenly dispersed.


AIR BUBBLES IN BATTER
Large air bubbles in a cake can be pretty unsightly in a beautiful slice of cake. You can avoid this by dropping the pan onto your countertop to burst any bubbles. Once you have filled your pan with batter and smoothed the top with a spatula drop it from about 3-4 inches above the countertop. The impact will force large air bubbles out and settle the batter in the pan, producing a more even shape. Only do this for cakes leavened with baking powder and baking soda. Egg foam cakes like the Genoise need the air bubbles to rise.

Friday, February 10, 2012

VANILLA CUPCAKES

I have wanted to put some cupcake recipes on my Blog for a while now. However with teaching and 2 kids, a dog and a house to maintain there seems so little time in the day. Got my cuppa tea and I am ready to to do it!! Here are 3 recipes that I love. I do find though when making cakes or cupcakes for that matter, when you have oil in the batter the cake or cupcake tends to stay moister for longer.

 
1.  THE ULTIMATE VANILLA CUPCAKE

 Yield : 16 cupcakes

*1 cup granulated sugar
*1 vanilla bean (slit the bean in half lenghtwise and scrape out the beans)
*1 3/4 cups (175g) cake flour (not self raising)
*1 1/2 teaspoons baking powder
*1/2 teaspoon baking soda
*1/2 teaspoon salt
*1/4 cup (57 grams) unsalted butter, room temperature
*2 large eggs at room temperature
*1/3 cup (75 grams) full-fat sour cream
*1/4 cup (60 ml) canola or vegetable oil
*1 tablespoon PURE Vanilla extract (don't use imitation)
*2/3 cup (160 ml) whole milk

METHOD
1. Preheat your oven to 350 F (180 C). Make sure the oven shelf is in the middle of your oven.
2. In a small bowl, combine sugar and vanilla seeds. (To get the seeds from the vanilla bean, with a sharp 
    knife slit the bean in half lengthwise and scrape out the seeds with a spoon) Break the seeds up into the
    sugar with the back of a spoon to better infuse the vanilla into the sugar.
3. In a medium bowl (stand mixer bowl) mix the cake flour, baking powder, baking soda, and salt.
4. Add  the sugar infused with the vanilla seeds to the flour mixture and mix well.
5. Add the butter to the flour mixture and using the paddle beater mix on a medium-low speed for 3
    minutes. Because there is not a lot of butter your mixture will resemble fine bread crumbs.
6. In a small mixing bowl, whisk together the eggs, sour cream,oil, and vanilla extract until well mixed.
7. Add the egg mixture to the flour mixture and beat on medium speed until just combined.
8. Slowly add the milk and mix on low speed until just combined. (The mixture is quite liquid- perfect!)
9. Fill cupcake liners just over 1/2 full.
10. Bake for 14 minutes and test to see if they are done by inserting a toothpick into the centre If it comes
      out clean it's done. If they are not done then leave them in the oven for a further 2 minutes. If they are
      still not done bake for a further 2 minutes until done. The cupcakes should be light in colour, not golden
      brown.
11. When cupcakes are done, remove them from the tin and cool on a wire rack.

Tip: Filling cupcake liners- Because all batters rise differently,some rise alot and some don't, bake a test cupcake with the batter and you can then see how much batter to put in your cupcake liner.
       This way you will have perfectly sized cupcakes and you get to eat the test cupcake too!!


2.  GOLDEN CUPCAKES   (Recipe adapted from Nick Malgieri - "The Modern Baker")

  Yield: 18 cupcakes

*2 3/4 cups all-purpose flour
*2 1/2 teaspoons baking powder
*1/4 teaspoon salt
*12 tablespoons (1 1/2 sticks) unsalted butter, room temprature
*1 1/2 cups sugar
*2 teaspoons vanilla extract
*1 teaspoon finely grated lemon zest
*6 large egg yolks
*1 (8-ounce/225 gram) container sour cream

METHOD
1. Set the rack in the middle of the oven and preheat your oven to 350 F (180 C)
2. In a medium bowl combine flour, baking powder, salt and mix well to combine.
3. In a mixing bowl combine butter, sugar, vanilla and lemon zest. Beat well with the paddle atachment
    on medium speed until lightened in colour, about 3-4 minutes.
4. Beat in the egg yolks 1 at a time, beating well after each addition.
5. Decrease the speed to lowest setting and add half of the flour mixture, mix until just combined. Stop the
    mixer and scrape down the bowl.
6. Beat in the sour cream on low setting and then add the rest of the flour. Once mixed stop the mixer and
    scrape down the bowl. Increase the speed to medium and mix the batter for 3 minutes.
7. Scoop the batter into your cupcake liners and bake till golden brown and cooked, about 20 minutes.
8. Cool the cupcakes in the pan on a wire rack for about 5 minutes. Take the cupcakes out and place
    them on the wire rack to cool completely.
9. Frost cupcakes with you favourite frosting and enjoy.


3. YELLOW CUPCAKES   (Recipe adapted from King Arthur Flour)

   Yield: 18 cupcakes

*3/4 cup (6 ounces) unsalted butter
*1 1/2 cups (10.5 ounces) granulated white sugar
*3 large eggs, beaten lightly
*1 teaspoon baking powder
*1 teaspoon baking soda
*3/4 teaspoon salt
*2 1/2 cups (10.5 ounces) unbleached all-purpose flour
*1 cup (8 ounces)yogurt, regular of low fat, plain or vanilla
*2 teaspoons vanilla extract

METHOD
1. Preheat your oven to 350 F. Line cupcake pans with 18 paper or silicone liners.
2. Beat butter and sugar in a large mixing bowl until they are well combined. Add eggs 1 at a time,   
    beating well after each addition. Once all the eggs are added, beat the batter at high speed with
    your electric mixer for 5 minutes, till it's light and fluffy. Stop halfway through and scrape down
    the bowl.
3. Add the baking powder, soda and salt to the batter, beating briefly till well combined.
4. Gently stir in flour alternately with yogurt. Now add the vanilla extract and mix.
5. Scoop batter into cupcake liners, about 1/4 cup.
6. Bake cupcakes for 22 minutes until done. Test cupcakes with a toothpick in the centre.
7. Remove cupcakes from the oven and place on cooling rack. Remove them from pan after about 10
    minutes.
8. Once cupcakes are cool decorate as you please.

Tuesday, November 22, 2011

CHOCOLATE CHIP COOKIES

I have tried many chocolate chip cookie recipes and these were definately one of the best. My favourite cookie of all time is a oatmeal raisin so adding the nuts to this chocolate chip cookie is the way I prefer it. This recipe is adapted from Cooks Illustrated along with tips for making a good cookie.

According to Cook's Illustrated adding melted butter adds a chewiness to the cookie. In this recipe they brown the butter for a lovely flavour but remember when browning butter, use a light coloured pan to see how brown the butter is getting.
Using brown sugar in the recipe gives the cookie a toffee flavour. Make sure the brown sugar you are using is soft and moist because using dry brown sugar will dry out your cookie. 

Recipe:

1 3/4cups (8 3/4ounces) unbleached all-purpose flour
1/2 teaspoon baking soda
14 tablespoons  unsalted butter
1/2 cup (3 1/2 ounces) granulated sugar
3/4 cups (5 1/4 ounces) packed dark brown sugar
1 teaspoon table salt 
2 teaspoons vanilla extract
1 large egg
1 large egg yolk
1 1/4 cups semisweet chocolate chips or chunks
3/4 cup chopped pecans or walnuts, toasted

Method:

1. Adjust oven rack to middle position and heat oven to 375 degrees. Line 2 large (18- by 12-inch) baking sheets with parchment paper. Whisk flour and baking soda together in medium bowl; set aside.

2. Heat 10 tablespoons butter in 10-inch skillet over medium-high heat until melted, about 2 minutes. Continue cooking, swirling pan constantly until butter is dark golden brown and has nutty aroma, 1 to 3 minutes. Remove skillet from heat and, using heatproof spatula, transfer browned butter to large heatproof bowl. Stir remaining 4 tablespoons butter into hot butter until completely melted.

3. Add both sugars, salt, and vanilla to bowl with butter and whisk until fully incorporated. Add egg and yolk and whisk until mixture is smooth with no sugar lumps remaining, about 30 seconds. Let mixture stand 3 minutes, then whisk for 30 seconds. Repeat process of resting and whisking 2 more times until mixture is thick, smooth, and shiny. Using rubber spatula or wooden spoon, stir in flour mixture until just combined, about 1 minute. Stir in chocolate chips and nuts (if using), giving dough final stir to ensure no flour pockets remain.

4. Divide dough into 16 portions, each about 3 tablespoons (or use #24 cookie scoop). Arrange 2 inches apart on prepared baking sheets, 8 dough balls per sheet.

5. Bake cookies 1 tray at a time until cookies are golden brown and still puffy, and edges have begun to set but centers are still soft, 10 to 14 minutes, rotating baking sheet halfway through baking. Transfer baking sheet to wire rack; cool cookies completely before serving.

Get some milk and enjoy!!!

Monday, November 21, 2011

ICING COLOUR CHART

I am asked by students how to blend certain colours if they don't have the colour they need. Here is a colour chart that may help. Remember, always start with small amounts of colour. Start with the base colour (always the first colour mentioned) and then add small amounts of secondary colours. 

ANTIQUE GOLD Add just an extremely small touch of Leaf Green to Golden Yellow
AQUA Sky Blue and Leaf Green
AVOCADO Use Moss Green color
BLACK Our paste color or Royal Blue, Christmas Red, Orange and Lemon
CHARTREUSE 9 parts Lemon Yellow, 1 part Leaf Green
CORAL Creamy peach and a touch of pink or orange and a touch of pink.
FLESH Add just an extremely small touch of Copper to white icing. Ivory can also be used. Light pink with a small amount of brown.
GRAY Add just a touch of Black to white icing.
HUNTER GREEN Kelly Green and a touch of Black
JADE Leaf green, Royal Blue and a touch of Black
LAVENDER Pink and Violet
MARIGOLD Lemon Yellow and Orange
MAROON Burgundy and Red Red
MAUVE Touch of Burgundy with very little Black.
MISTY GREEN Leaf Green, Royal Blue and a touch of Black
MOSS GREEN Our paste color or Violet and Lemon Yellow
MULBERRY Mix Rose with a touch of Royal Blue.
NAVY BLUE Royal Blue and Black
PERIWINKLE Royal Blue and Violet
PLUM Use violet with a touch of Christmas red.
RASPBERRY Pink and Red Red
RUST Orange, Red Red and Brown
SILVER We do not advise attempting to simulate silver color in icing. Instead, add silver leaves or other silver accessories to the cake.
TEAL Use teal paste color or Lemon Yellow and Sky Blue
TURQUOISE Sky Blue and Lemon Yellow
WARM GOLD Use Golden Yellow with just a touch of brown.

This colour chart is using the Wilton Gel colours.
Remember to mix enough icing colour to complete your design as it is very difficult to replicate the same colour twice.

Have fun!!!

RED VELVET CAKE

I have tried a few Red Velvet cakes and this one by Elisa Strauss is my favourite. This cake yields three 9-inch rounds, 1 half sheet (13x18 inch), or 24 cupcakes.

3 ½ cups (14 oz.) cake flour
½ cup unsweetened cocoa powder
1 ½ tsp. salt
2 cups (16 oz.) canola oil
2 ¼ cups plus 1 tbsp. (16 oz.) granulated sugar
3 large eggs
1/3 cup (3 ounces) red food coloring (I like to use the small jar of Wilton "no taste red" gel colour)
1 ½ teaspoons pure vanilla extract
1 ¼ cup (10 oz.) buttermilk
2 tsp. baking soda
2 ½ tsp. white vinegar

PREPARATION:

1. Preheat the oven to 350°F. Brush the bottoms and sides of the pans with shortening and line the bottoms with parchment paper.

2. In a large bowl, sift together the cake flour, cocoa powder, and salt. Set aside.

3. In the bowl of a standing mixer fitted with a paddle attachment, combine the oil and sugar and beat on medium speed until incorporated.

4. Set the mixer to low speed and add the eggs, one at a time, scraping thoroughly between each addition.

5. Add the red food coloring and vanilla and beat until incorporated.

6. Alternately add the flour mixture and buttermilk in two batches, starting with the flour. Scrape down the bowl between each addition until thoroughly combined.

7. In a small bowl, whisk together the baking soda and vinegar. Set the mixer to medium speed. Immediately add the baking soda mixture and beat for 10 seconds.

8. Divide the batter evenly between the cake pans or muffin tins. For 9-inch cake pans, bake 1 hour or until a toothpick comes out clean; for half-sheet pans, bake 45 minutes or until a toothpick comes out clean; for cupcakes, bake 20 to 25 minutes, or until they spring back after being touched.

9. Allow the cake to cool for 20 minutes on a wire rack. Once the cake is cool, turn cakes out onto rack. Remember to turn cakes right side up.


Tip: Cakes can be stored in the freezer for up to five days, tightly wrapped in at least two layers of plastic wrap.

Monday, October 10, 2011

YELLOW DOWNY BUTTER CAKE

This cake is one of the best butter cakes I have tried, from baker extraordinaire Rose Levy Beranbaum. I have made cupcakes with this batter and it works perfectly.
Using all egg yolks instead of whole eggs this cake has a rich yellow colour, a soft, fine texture and delicious flavour.

INGREDIENTS
6 large egg yolks
1 cup milk
2 1/4 teaspoons vanilla
3 cups sifted cake flour
1 1/2 cups sugar
1 tablespoon + teaspoon baking powder
3/4 teaspoon salt
12 tablespoons unsalted butter (must be softened)

METHOD
Preheat the oven to 350°F (180 C).
In a medium bowl lightly combine the yolks, 1/4 cup milk, and vanilla.
In a large mixing bowl combine the dry ingredients and mix on low speed for 30 seconds to blend. Add the butter and the remaining 3/4 cup milk.
Mix on low speed until the dry ingredients are moistened. Increase to medium speed (high speed if using a hand mixer) and beat for 1 1/2 minutes to aerate and develop the cake's structure. Scrape down the sides. Gradually add the egg mixture in 3 batches, beating for 20 seconds after each addition to incorporate the ingredients and strengthen the structure. Scrape down the sides.
Scrape the batter into the prepared pans and smooth the surface with a spatula. The pans will be about 1/2 full.
Bake 25 to 35 minutes or until a tester inserted near the center comes out clean and the cake springs back when pressed lightly in the center. The cakes should start to shrink from the sides of the pans only after removal from the oven.
Let the cakes cool in the pan on racks for 10 minutes. Loosen the sides with a small metal spatula and invert onto greased wire racks. To prevent splitting, re invert so that the tops are up and cool completely before wrapping airtight.

Wednesday, August 31, 2011

CHOCOLATE FUDGE CAKE

I love the fudginess of this cake. It is rich, decadent and easy to make. I got this recipe from a world renowned cake decorator....Toba Garrett (The Well Decorated Cake)


Ingredients:
2 1/2 cups all-purpose flour
1 1/4 cups (285 g) granulated sugar
3/4 cup (170 g) dark brown sugar, packed
1 cup (110 g) Dutch processed cocoa powder
2 1/4 tsp baking soda
1 1/2 tsp salt
2 1/4 cups (18 fl oz or 540 ml) buttermilk
1 cup (230 g) unsalted butter, room temperature
2 large eggs
1 1/2 tsp pure vanilla extract
6 oz (168 g) melted semisweet fine quality chocolate

1.Heat oven to 350°F (175°C). Butter and parchment line two 8x2-inch (20x5-cm) baking pans.
2. Measure all ingredients (except the chocolate) into a large mixer bowl.
3. Blend for 30 seconds on LOW speed, scraping bowl constantly.
4. Blend in the melted chocolate and beat 3 minutes on HIGH speed, scraping the bowl.
5. Spoon into the pans and level them well with an offset spatula.
6. Bake layers for 45 to 50 minutes or until a toothpick inserted comes out clean.

Storage: Double wrap the cake in plastic wrap. It will keep in the refrigerator for up to 2 weeks or in the freezer for up to 2 months.

Wednesday, August 24, 2011

CHOCOLATE CAKE

This cake was made by a friend mine which I thought was probably one of the best cakes I have tried. It is very moist and can easily be made into cupcakes. The batter is very liquid but that does not affect the final cake.

SUPER MOIST CHOCOLATE CAKE
2 cups sugar
1¾ cups flour
¾ cup cocoa
1½ teaspoons baking powder
1½ teaspoons baking soda
1 teaspoon salt
2 eggs
1 cup milk
½ cup vegetable oil
2 teaspoons vanilla extract
1 cup boiling water

Heat oven to 350°F. Prepare two 9-inch round baking pans with non-stick cooking spray.
In a medium sized bowl using a whisk, mix together sugar, flour, cocoa, baking powder, baking soda and salt in large bowl.
In a smaller bowl mix together eggs, milk, oil and vanilla. Add the wet mixture to the dry ingrediants and beat on medium speed of mixer 2 minutes.
Stir in boiling water (batter will be thin) with a spoon or spatula. Pour batter into prepared pans.
Bake 30 to 35 minutes or until wooden pick inserted in center comes out clean. Cool 10 minutes. Remove from pans to wire racks. Cool completely.